10 Steps To A Perfectly Carved Pumpkin This Halloween!
Have you ever drove by someone’s house and wondered how they carve such amazing pictures on their pumpkins? So what’s the trick, how does that one neighbor always carve these insane pumpkins every year? Here is a few tips to help you carve the perfect pumpkin & elevate your Halloween carving game!
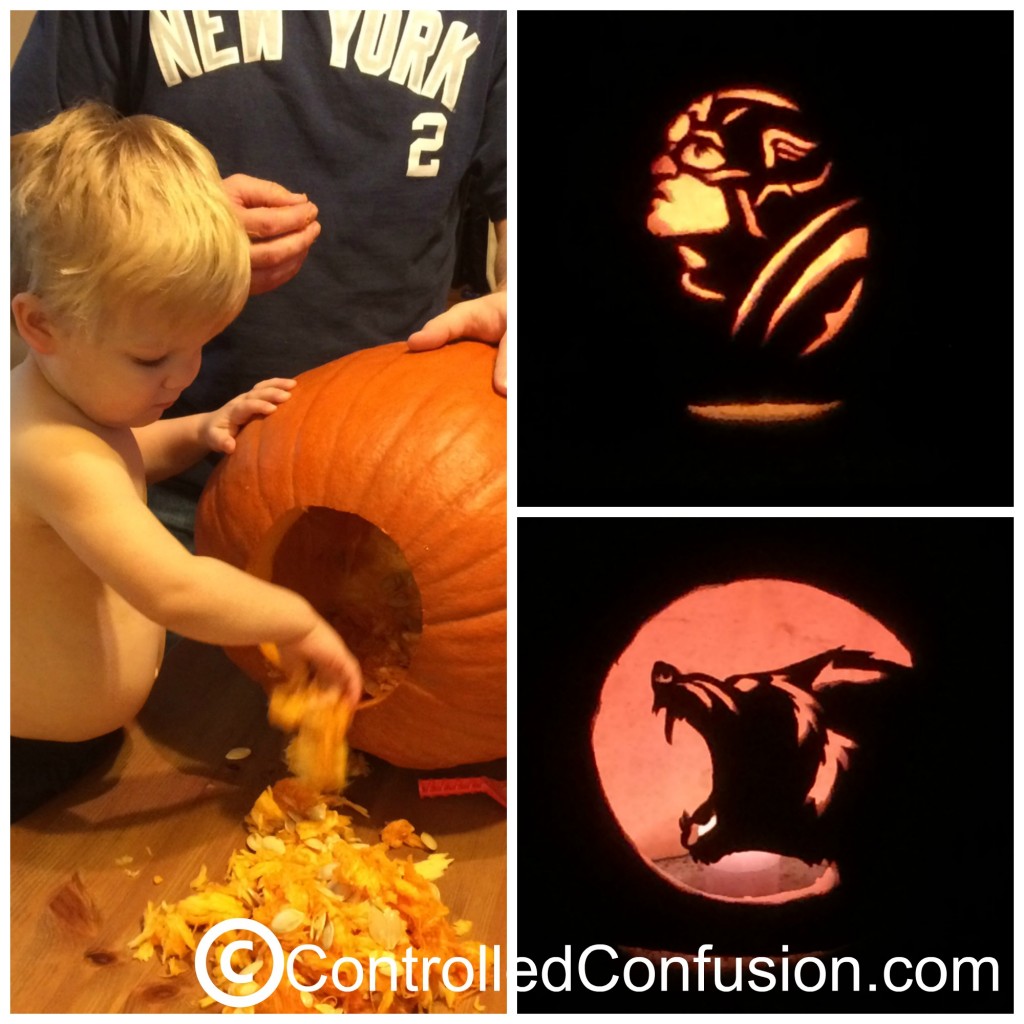
1. Choose your design and print it out. You can find tons of designs for free with a simple internet search.
2. With scissors cut out the pieces of your design that you will need to remove from the pumpkin. If you printed a pre-made design then the pieces will already be labeled for you.
3. Cut the bottom of your pumpkin and remove the seeds etc. I cut the bottom so that my pumpkin’s stem stays on top and looking good! (you can throw the bottom away)
4. Tape the design to your pumpkin by slightly folding the corners of the paper. Get it as flat as possible on the face of the pumpkin.
5. Use the template & trace the design with a marker of some type. I prefer a sharpie but any marker will work. I also mark the pieces as remove so I don’t get confused and cut the wrong parts out.
6. Use mini saws, never use a knife. It’s impossible to get those intricate curves with a standard house knife. You can get an inexpensive pumpkin carving set at nearly any store you go into during the Halloween season for around $5-10.
7. Begin by cutting any small pieces that will need to be removed first. If you cut out the large ones then it is harder to remove those small pieces without damaging your design.
8. When cutting, make small cuts at a time making sure to follow your design. It’s important to take your time, it’s easy to make mistakes if you try to rush the process.
9. Wipe down your masterpiece and check for any missed sections that may need to be cut.
10. Enjoy the fruits of your labor!
Now get out there and give it a shot, it’s much easier than you think!
Did you carve a pumpkin this year? If so what was your design?
Enjoy! For more Fall themed crafts visit a few of my favorite bloggers:
- 3D Paper Pumpkin by Confessions of an Overworked Mom
- DIY Guide to Smashing Pumpkins by Champagne Living
- 10 Steps to a Perfectly Carved Pumpkin by Controlled Confusion
- Mason Jar Candle Tutorial by Life with Lisa
- How to Create Pumpkin Candles by Tools 2 Tiaras
Would your brand like to participate in #FallFun31? Fill out this form for more information.




No wonder, I was doing it wrong. Makes to total sense to cut out the small pieces first but I always did it last and it ended up breaking.
I was never a great pumpkin carver. I couldn’t even get the triangle eyes the same. I guess I just didn’t have the patience. I’ll have to try one and see if I can do it
How adorable! I really prefer drawing on ours. That way, we can use the pumpkin later for cooking.